It's official - the candle season is here, is it not?! Well, I think I waited long enough, mind me I am lighting candles since September and it's just wonderful how cosy my tiny studio feels. It is small all the time but you know what I mean, the warm light is the essence of hygge I think. Anyway, that's not what todays blog post is about - my fabulously easy baking paper concrete candle holder tutorial!!! Yes, you heard right we are going to create a bit of a tree bark texture with something as handy as baking paper. We wont need any grease, fat or tape at all. In a way or two it will feels like baking but what do I know, I can't bake even though I enjoy a good cake like no other. Anyway, moving on - shall we get started?!
Let's sort the materials first...
For the mould - could be any cardboard or plastic mould [large yogurt cups for example], whatever you find or could recycle, the only thing I would not recommend to use is glass or ceramics. And of course you could use my moulds too!
Furthermore, backing paper, smooth or with waffle texture, makes no difference, and the candles you wish to use this season. Some wood cut offs or sticks could come in handy. Mixing tools, like a bowl and big spoon or whisk, water and quick setting concrete pre mix [like Jet or BlueHawk] and a bit of sanding paper. I am sure your local builders depot will have something in stock. The only thing which matters for this project is that it is 'quick set'. And to keep you save - please some rubber gloves, a mask and glasses.
Project time will be altogether about 1 to 2 hours. However, you will have spare time of about 3 hours before the candles holders can be unwrapped and finished.

I am using a large brown tape rolls. I cut two large pieces of baking paper. As the picture suggests at least 2 times the diameter of the tape roll.

Cover the inside of the mould. Make sure you go all the way down so that a proper base can form and your candle holder does stand safely.

Don't mind the creases and wrinkles, you want them to create the texture. Bend the remaining bits of the baking paper over the top like shown above.
Extra tip > Usually this will be enough but should you have chosen a larger form or your baking paper is just not enough to be bended down a rubber band or tape could be the solution.

So the moulds are prepared and the candles are sorted to the shapes. It's time to get the rubber gloves, mask and glasses on. Prepare your workstation in a way that you can easily reach the concrete mix, have space to mix and your moulds have a place were they can be moved but don't have to be lifted to where they can cure for about 30 minutes. Candles as well as the wooden cut offs, sticks or spoons should be close by too.
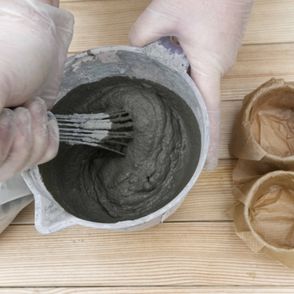
Time to get some water and start mixing. For these two moulds it was absolutely plenty to mix 100ml of water with about 3 cups of concrete. However, the mix will vary with the brand you use and it's best to read the instructions. However, your mix will be just right when it looks a bit like mash, keeps the form until you give it good shake.
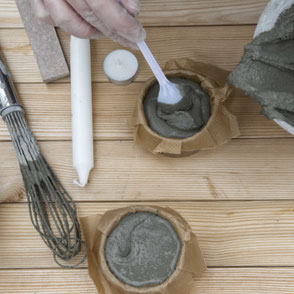
Fill the moulds and use a spoon to shake the concrete inside the moulds to even the surface. After you have filled the mould you will have about 20 minutes for the next steps. Slide the moulds to the spot where they can remain for about 30min. Try not to lift them!
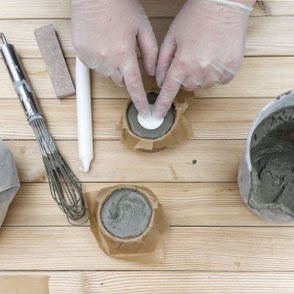
Give it 5 minutes and start pressing your candle into the wet concrete. If the concrete is about to set you wont need anything to hold the candle down. However, if you have used a little too much water or it is not at that stage yet a wood cut off placed on top will do the trick.

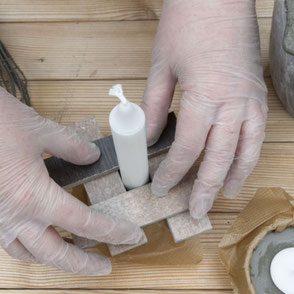
Dinner candles require a bit more wittiness. Proceed with inserting the candle where ever you fancy it to go. Use 4 helpers - wood cut offs, flat spins or large clothespins. Stack them around the candle as pictured left. Check if the candle is almost straight and let sit.
Extra tip > When you use a shake movement, best up and down, while inserting the candles the surface will even with it and you don't have concrete waves around the candle recess.
Wait for at least three hours. Remember my little tip from the Concrete Copper Wire Air Plant Holder Diy, if it is still warm, wait a bit longer. Otherwise move on with unwrapping as shown below...

Lift the paper and take the cardboard ring or your mould off.
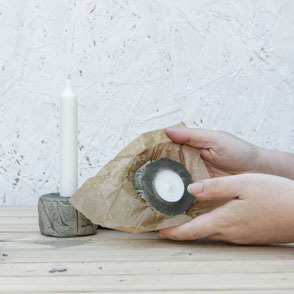
Take the baking paper off as well. This will go fairly easy but it could be that you feel the paper rip from time to time. Let it please, you will need to peel those off in a second step to keep the depth of the texture.
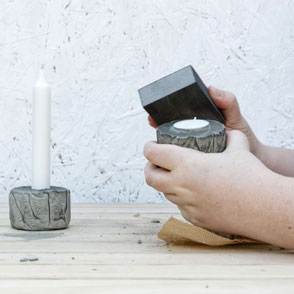
So sort our the depth point of the texture where the paper ripped. If you have created big creases try to cut the paper of rather than pulling it out.
Finishing touch - sand any sharp corners should there be any. A bit of fine sanding paper should do the trick.
Tadahh! Done that was it - beautiful right!!! I would give it another day to dry before I light the candle but as long as you don't burn the dinner candle all the way down straight away you could go ahead and enjoy the first candle light of your new homemade tree bark backing paper concrete candle holders, wow quite a mouthful. I hope you had as much fun as I did and will be happily showing them off.
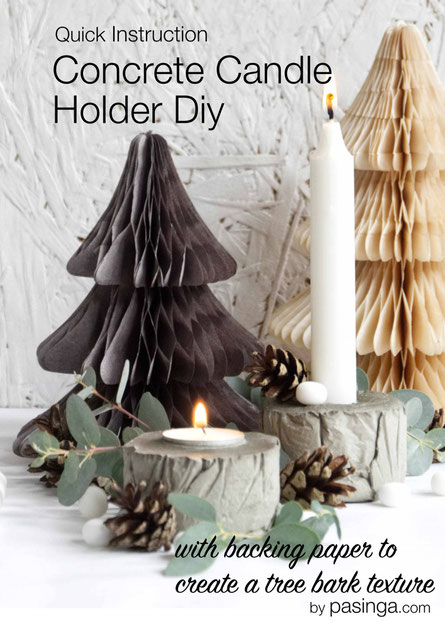
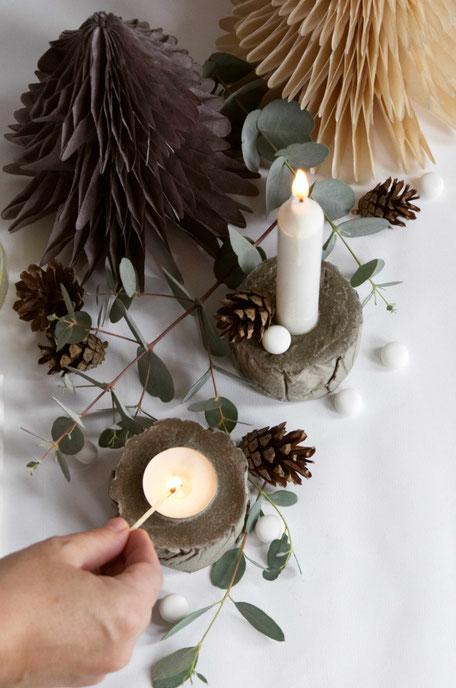
Let's get started with the decoration! I am sure there are endless possibilities on where to incorporate these cuties or on how to style them but it is the end of October and I am just after an autumn, hygge almost Christmas scene to let the tree bark texture of these candle holders shine, so here we go ....
On the right is my quick instruction for pinning or keeping in your scrapbook but this post will be here too and I will love having you stop by!
Enjoy the rest of your day and feel invited to leave a comment with questions you might have or to let me / us know how you got on!
Antje


Write a comment