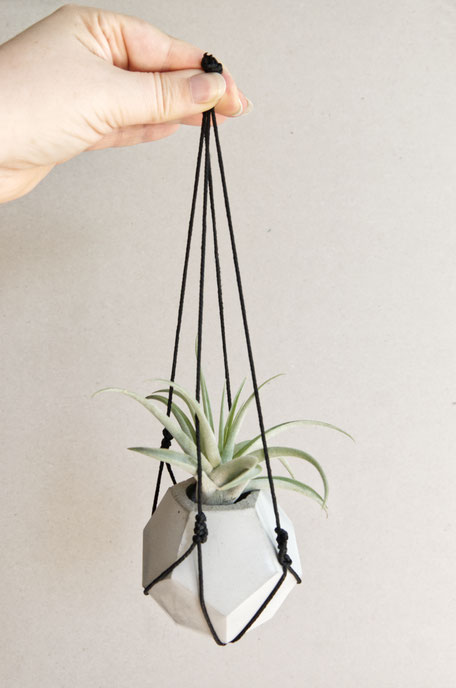
I used the same things like last time as I thought you either purchased some of the things you need or have them already. In any case I did not want to cause waste. So get your ruler, scissors, your vessel and plant, and of course string, twine or ribbon you wish to use.
My vessels, I used this netting for are both, are about 10cm tall and the plant, Air Plant Capitata Peach, adds another 10cm. To measure the string length I went for 4 times the length.
After my last DIY Macramé to hang your geometric concrete vessel I received so much amazing feedback - thank you! and a lovely comment requesting one without the tassel. You are absolutely right, the tassel is an additional eye-catcher which could take away from the geometric vessel or plant. It took me a moment to find a way but here we go ...


Altogether you need 4 strings no looping [the other macramé can you find here] this time. So we are working with 4 strings each at least 60cm but not more than 80cm long each.

Take four endings and knot them together tightly by pulling each string ending individually until the knot stops going tighter. If you use a nylon string you could use a lighter to melt the endings together neatly above/ into the knot. Tip, use the metal ruler to flatten the molten ending.
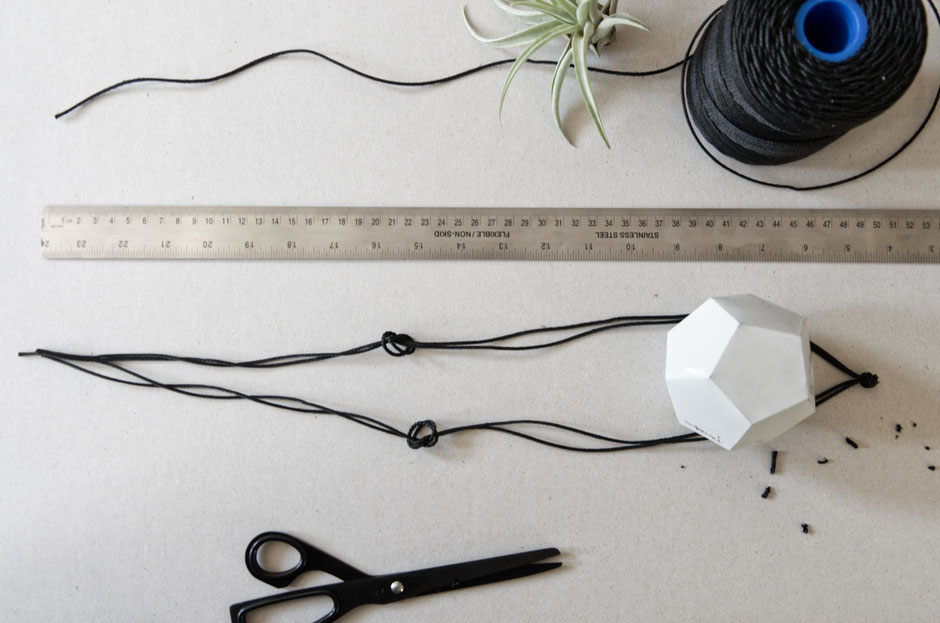
Now, use your vessel and place it with space around it in front of you. Part the four strings and lay it around your vessel. There should be two strings to each side which you start knotting together. The height for the first row of knots will depend on the height of your vessel. Mine is 10cm plus plant height so I went for something above 25cm for my first netting nots measured from the string endings.

Altogether you should have 4 knots now, compare with the image on the right if you like. There should be two knots of each height of the netting.
Shown to the left, I moved on to knot one string of each bundle together. The second row of knots is about 4 to 5 cm below the first.

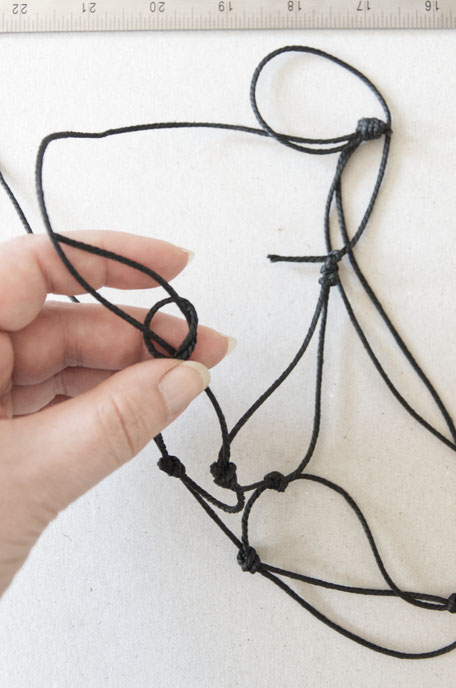
I found it helpful to put the vessel in place just as shown below with about 2 knots for the remaining.

I trimmed the left over ribbons and the finished Macramé net should look something like the image below ...
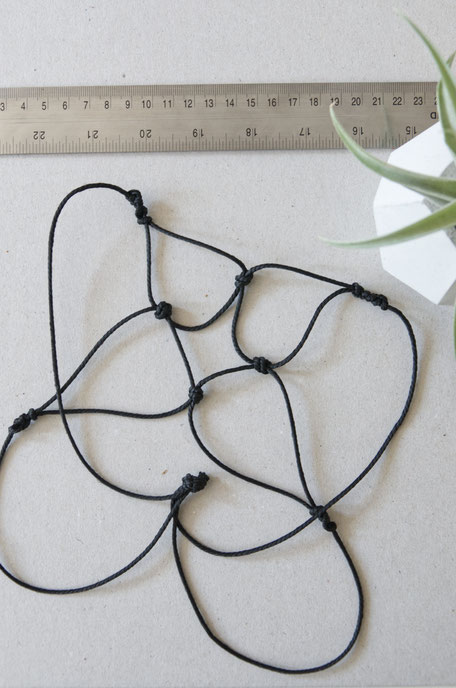

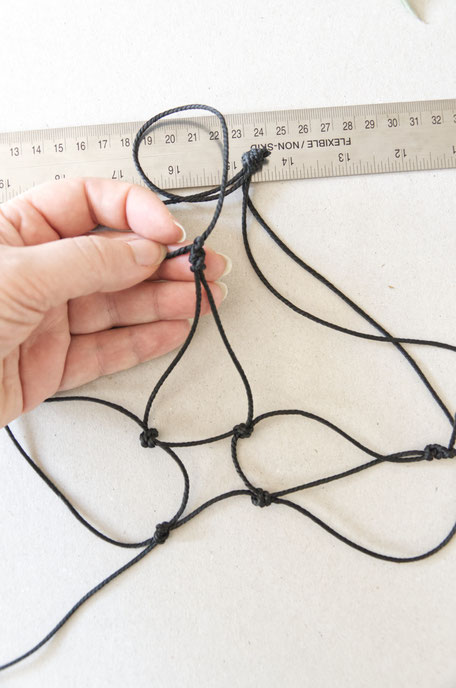
Now it gets a bit tricky but not to worry - since I could do it you can too! You now take the open endings of string/ribbon and pull them upwards instead of going further down in your netting. So separate the strings and attach them one by one to one string line between the hanging knot and the first knot of the netting. The left image shows the simple knot and below you can see the square base forming as well as drop shape netting where the vessel will go.

After all four knots have been in place and the netting looked even I used the endings to add more simple knots. I had string left for 4 tight knots above each other to mark the drop ending as shown below.
That's it - time to find the right spot and to nest your geometric concrete vessel with plant in your Macramé!

Yes indeed, you have been right, with the concrete diamond you can see it clearly that a tassel would take away from this beautiful
shape. Thank you for the pointer, keep them coming and I hope you have fun making this DIY Macramé too!
Happy making and decorating and as always I would love to see your designs so share via the comments below, email, tag or #pasinga!
Antje
You might also like ...


Write a comment